


Wow, it's been too long since I posted!! But I hope you'll forgive me when you see what I'm going to share with you today! These pretty little pastries are called French Bonbons, and I'm going to show you how to make them!

I suspect that these pastries are just called french because they are such fancy little affairs, but they really have New Zealand origins! The recipe for the French Bonbons comes from Alexa Johnston, author of the New Zealand Cookbook Ladies, A Plate. The Bonbons have a sponge cake base, a meringue cookie top, and whipped cream and jam in between! The recipe involves several steps, but each step is not difficult. It's the sort of recipe that would be so pretty for a bridal shower or tea, and the extra effort would be so worth it!

The recipe for the French Bonbons isn't in the book, but you will find a treasure trove of vintage New Zealand recipes just like Grandma used to make. The recipes include Lamingtons, Cream Filled Sponges, Ginger Kisses, Custard Squares, and Chocolate 'Eclairs to name a few!

OK, are you ready to make them? Let's get started! We'll begin with the sponge cake base. First, preheat your oven to 400 degrees and line 2 baking sheets with parchment paper.

Next, bring your eggs to room temperature. (The quickest way to do this if they are in the fridge is to put them in a bowl, and cover them with hot water from the tap, and leave them for 10 minutes.) Sift together your flour and baking powder. Put your egg, egg yolk and cold water into a bowl with the sugar (recipe calls for caster sugar which is extra fine granulated sugar such as the Dixie Crystal brand.) Beat these ingredients with an electric beater for at least 5 minutes until they are pale yellow and fluffy. The mixture should fall in ribbons from the beaters and remain on the surface for a few seconds before sinking. (see above photo)

Next, sift the dry ingredients onto the egg mixture and fold through carefully using a metal spoon.

The next step is to drop the mixture in very small circular spoonfuls onto the prepared trays, trying to keep them all the same size. You could also use a piping bag with a plain circular tip, which is what I did. **A tip that I want to pass along to you is to use a template. Click this link for the template. I use this template for making french macarons and I found it extra handy for making this recipe as well! Just print it out on your printer and place it under your parchment paper. Then pipe your sponge batter onto the circles. You will use it for piping your meringue cookies on as well. That way, the top and bottom of your pastries will be about the same size. *Be sure to take out the template before baking.

Pipe your mixture onto the baking sheet into tiny mounds. This is how your sponge cakes should look after piping. Then bake for 5-6 minutes until just golden.

Leave on the tray for a few minutes before removing to a cooling rack. (mine were not as golden as they should have been but I did bake them the full 6 minutes.)
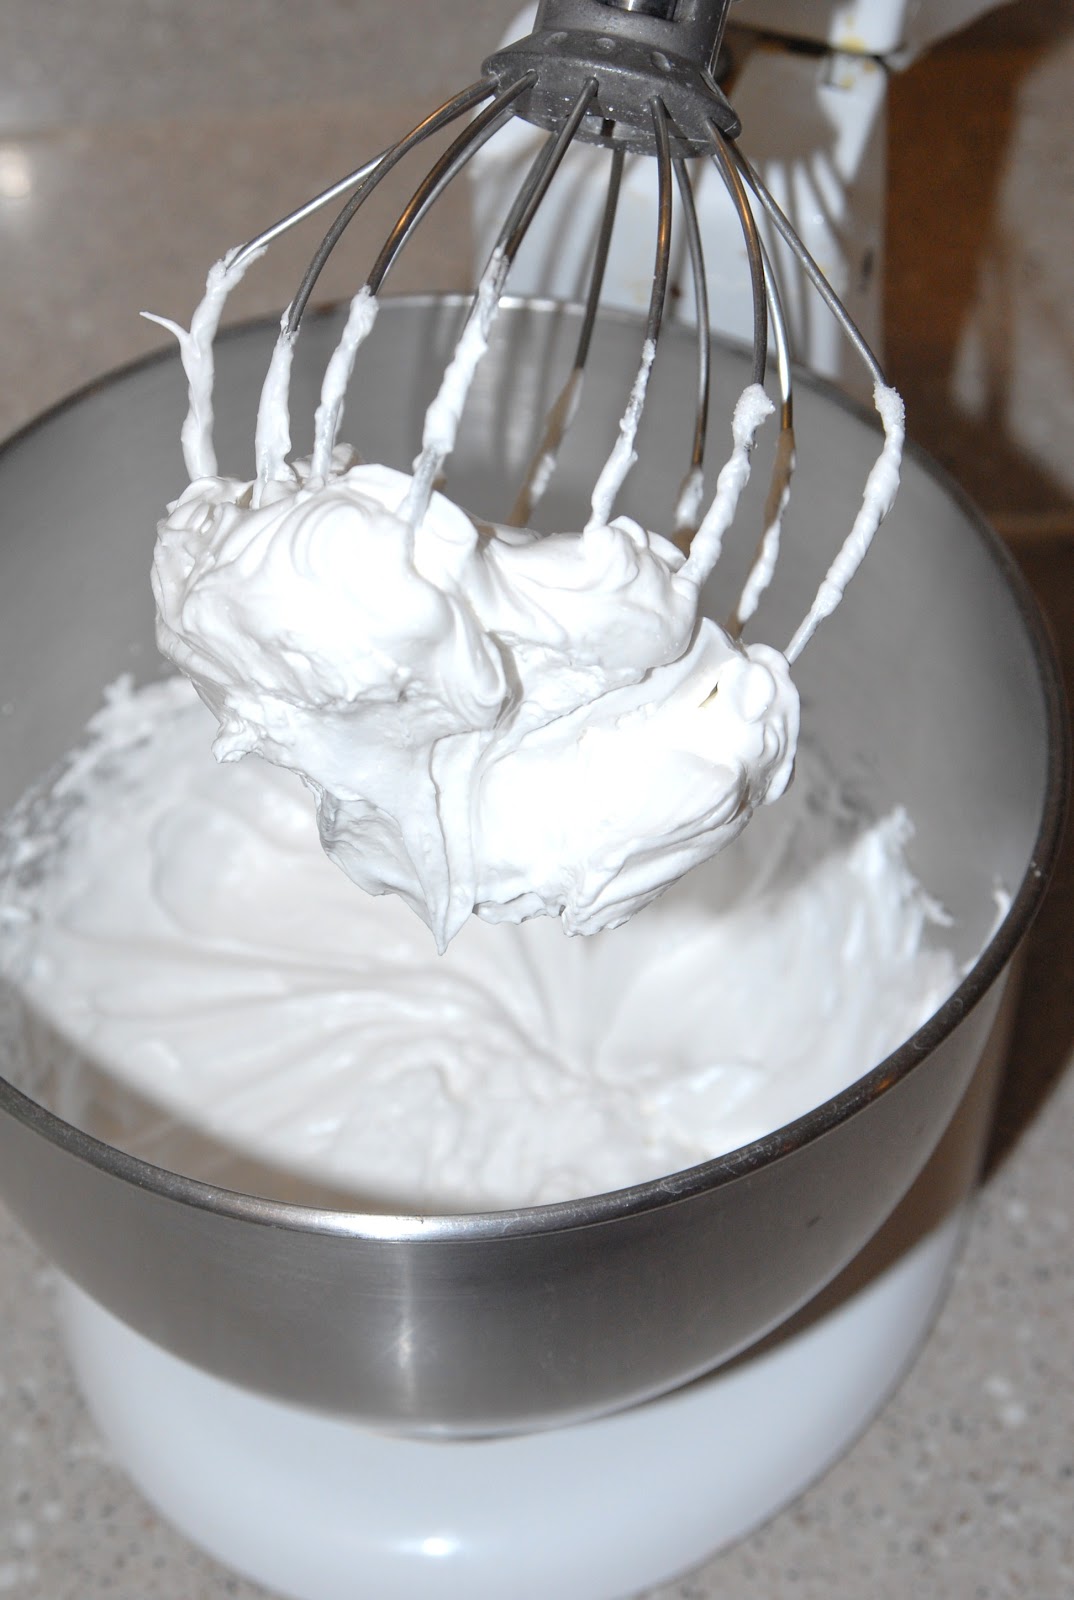
Next we're going to make the meringues, and this is where my recipe is a little bit different than the original. The original recipe uses one egg white to one cup of sugar. I tried twice making the meringue batter that way and it just didn't work for me. The batter was really flat and I just think it was too much sugar for the one egg white. I poured the first batch out. I did bake the second batch, but after baking, the meringues were way too sweet. So, what I did was use 2 egg whites, room temperature, no water. Whip egg whites to a foam, add a pinch of salt and beat on high with a wire whisk attachment until stiff peaks. Then begin adding your sugar one spoonful at a time until incorporated and you have stiff shiny peaks.

Then fill another piping bag with the meringue mixture and pipe circles onto your other parchment lined baking sheet (with the template underneath.)

Sprinkle meringues with a few sliced almonds (because the meringues were so small, I actually chopped the sliced almonds a bit.)

These are the almonds I buy - Sam's Club.

Bake the meringues at 275 degrees (original recipe says 300) for one hour, then cool completely on a wire rack.

Now we begin to put it all together! Place your sponge cakes, topside down, into some paper cases. I got mine from Wilton, I think they are called candy cases.

Then whip the heavy cream, remembering to use a chilled bowl and chilled beaters. Now, you can do two things at this step. The original recipe says to put a small spoonful of jam or honey onto each sponge cake, then top that with whipped cream. Another version of this recipe here says that you can instead just whip the jam or honey together with the heavy cream. That's the version I used. I had some strawberry jam, so I used it, and since the mixture wasn't as pink as I liked, I add one drop of pink food gel.

I used a third piping bag (always with the same tip) and piped circles of my whipped cream onto the sponge cakes. Then you top the whipped cream with a meringue cookie, sprinkle tops with some powdered sugar and your done!!

They are so pretty, don't you think?

For the recipe, just click on the link! I'll be joining Sandi from Rose Chinz Cottage for Tea on Tuesday. Please join us!

Thanks for visiting!!
I LOVE these! They are adorb! Maybe I can try whipping up some of these myself! (:
ReplyDelete-Carrie Eve @
www.a-hooahs-housewife.blogspot.com
Thanks Carrie! You CAN do these!! xo Jina
DeleteThey're just beautiful! And I'm sure they taste amazing! Thank you for showing us!
ReplyDeleteErica :)
Thanks so much Erica! They are yummy! So many different textures going on - really different! xo Jina
DeleteThese little bonbons would be so sweet to serve at my next tea. Thanks for your version of the recipe.
ReplyDeleteThey would be lovely at a tea! xo Jina
DeleteWow! I a very impressed and you're right -- they really are easy -- just several steps. Yours look magazine picture ready. If I host something elegant I may try them and darn, I bet they are really good!
ReplyDeleteYou can even bake the sponge cakes and meringues a day ahead and put them in a zip lock bag, then put the Bonbons together the next day! Thanks for your comment!! xo Jina
DeleteOh my! Beautiful bon bons. My tummy is growling!!!!! Happy tea day!
ReplyDeleteHello Jina,
ReplyDeleteSorry I am so very late visiting. It's been a sad and busy week what with Hubby's nephew passing away suddenly and my son flying home from BC for the funeral.
Your little Bonbons are adorable and I can just imagine how good they are! They would be so pretty and delicious for a tea. Thanks so much for sharing the recipe and joining me for tea. Wishing you a lovely week.
Blessings,
Sandi
Your bonbons are gorgeous! You have many lovely looking treats on your sidebar. Can I come over and have tea and pastries with you?
ReplyDelete