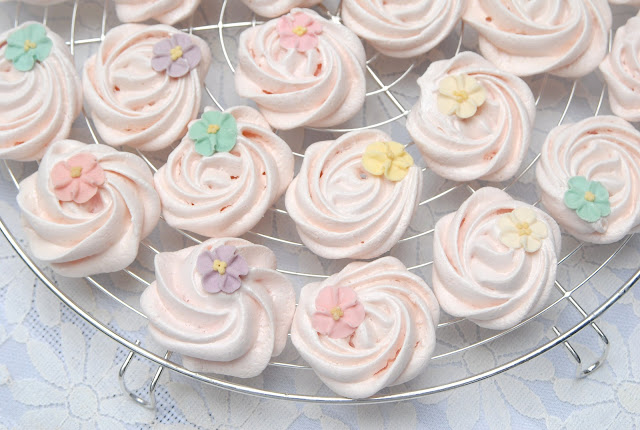
Today my daughter and I made pretty little meringue rosettes. She absolutely adores meringues and will eat every last one if not watched!
The cookies here look pretty enough, but not as pretty as they started out.
Peach was not the color I wanted, Pink was! Here at Pink Piccadilly Pastries, we like our Pink! (lol) I evidently had the oven too hot. I baked the meringues for one hour at 275 degrees. I guess next time I'll have to go with 250 degrees. The photo below shows the pre-baked meringues.

I lined my baking sheet with parchment paper and placed my handy dandy template under it so that the rosettes would be about the same size. (see previous post to get your template) If you're using a template, make sure to remove it prior to baking. I fiddled around with lots of different recipes for meringues, and this is the one that we like the best. Here's what I did: I take 4 egg whites, bring them to room temperature, put them in my mixer and beat them (with the wire whisk attachment) on medium speed until they become foamy. This doesn't take long. Then I throw in a pinch of salt, turn the speed to high, and beat the egg whites until stiff peaks. Now I begin adding my sugar (1 cup total) one tablespoon at a time.

I wait about 15 seconds in between the spoonfuls and keep going until I've added all the sugar. I beat just a couple of minutes more until the sugar is dissolved and then I add my food coloring. Next I fill my piping bag with the mixture, and using my Wilton 2D tip, I pipe little rosettes around the circles of the template. Going counter clockwise, you begin with your tip in the middle of the circle, make one small circle around, then another circle around the first one. Make sense?
I had some pretty little royal icing flowers, so I put one on each rosette. Unfortunately, the little royal icing flowers faded in the heat as well! I'm not sure they are really meant to be able to withstand the heat of the oven, but I didn't know how I would attach them after baking, except to make a batch of royal icing just for glue!
So, we ended up with cute little vintage looking peach colored meringues, which didn't bother my daughter one bit. They tasted delicious! Just make sure to put them in a sealed container or plastic bag after they have cooled because they go soft really fast in humid weather! This recipe will make about 5-6 dozen small meringues. I know I sound like a broken record, but wouldn't these be adorable for a tea or shower? They're inexpensive, easy to make and you can color coordinate them to fit your party! I just love meringues!! Have a lovely day!!


